Page hits. I feel popular!

Monday, May 24, 2010

HG G Gundam Work Log 2: Light Mods

This being an HG, I am not as hesitant to jump in and start messing it up as I would be with an MG kit that I paid several thousand yen for. The first mod in this build occurred when I was building the skirt. It snapped. But it snapped right in the middle where I was going to cut it anyway. This will allow the front sections of the skirt to move independently. I will leave it the way it is so that there is some friction which will help these pieces stay in position.
Here's the upper leg. The side has a seam line yet the rest of the side of the leg has no panel or seam line. So.. let's get rid of that seam.

Oh ya. Just lather that glue in there.
The red wing pieces of the コアランダー have hollow on the inside for reason unbeknownst to me. It looks kind of tacky, and there is no indication in the manual that there is a purpose to them (although I have been known to miss those kinds of things). To the putty!
That's better.

On the underside of the shoulders there are small vents. If I left them as is they are almost indistinguishable from the rest of the shoulder due to being molded as part of the shoulder armor. I want to bring those out.
That's one way to bring it out!

I haven't yet decided what I will use as a vent, whether I will clean up the piece I just cut out or whether I will look at aftermarket pieces, or even build my own. It's all up in the air.

One thought I had; if I build my own vents the gaps would probably be fairly large, meaning what is behind the vent would be viewable. As it stands, the underside of the shoulder pieces aren't all that nice to look at so I figured I would put in a 'background' before moving onto a decision with the vents.

We'll just glue this little plastic piece in here.
Let that dry and then glue the shoulders together so I can take out the seam lines.

That's it for today. Next up I will be trying to figure out what I will do with the head. There's a big seam on there as well but modding it may be a little difficult. I have a plan that may work though.

In Unicorn news, the feet have been decaled as well as the Gatlings. I now await a rain free day in which I can spray the final topcoat and then do the final assembly.

Then pictures!

Sunday, May 23, 2010

HG G Gundam Work Log 1: The Build


The G Gundam. When I first saw images of it as a Master Grade kit I wasn't too intrigued. The glowing hand doesn't do anything for me really and I don't know the anime at all. However I felt strongly compelled to pick it up after looking through the manual and box, and it's tough to resist the plamo temptation. Open up the manual and you are shown a very nice kit. A lot of work has been done to that kit in the picture and perhaps I can come up with something similar, or destroy it altogether. But that's okay! It's an HG. Far less expensive than an MG and I won't feel a great loss if I screw something up.
Open up the box and here's what you will see. Three bags of runners. That's it? Just three? I am disappoint.


Here's the.. what's this thing again? Sometime I feel I need a Gundam tutor. Someone who can tell me what the hell this thing is that I am constructing and what it does. According to the manual this is the コアランダー. Okay then.


And here's the torso semi-assembled. One thing I noticed right away is that although the manual shows these tubes as being yellow, they are just molded in blue with the rest of the chest. Hmm. I may want to fix this.
Here is one tiny head. Really tiny. The macro setting really shows a lot of the detail though. If you look closely, you can see my DNA. Megapixels at work!


The forearms were very straight forward, much like the rest of this little HG. One thing I have noticed during construction is that the armour doesn't really fit over top of an assembled frame like an MG but rather, the frame pieces are more or less constructed around the armour pieces. What does this mean? Easy seam line removal!
Shoulders! I will definitely be removing seam lines on these (among other things). More on that later.
Tuddah! Arms! (Really, what else is there for me to say here?)


And the top section is complete. I am impressed by the amount of detail molded into this HG kit. People have been applauding Bandai's HGUC line for some time and now I can see what all the fuss is about. I am intrigued.

...and Suntory Premium Malt Beer... mmm...

I like the design of the feet and haven't considered any modifications, but that could change at any time though. I be wishy washy.

Here are the sections you assemble before the final construction of the legs. Again, due to the way the legs are designed, seam line removal looks to be easy, but how many seams/panel lines are too many? Too few?_


The assembled skirt. I already have decided on a modification to this section (explanations on the way).


And there he is fully assembled. All systems go!

But this is more how I wanted you to see him.


Next post I will explain some of the sections I want to change and the modifications I anticipate doing. I should mention here that I chickened out on the planned modifications to the Unicorn. After several different design attempts I wasn't confident enough in my plan of action for modification and the last thing I want is to have the overall look of the Unicorn model ruined, or detracted from, because of terribly modded feet. I think the HG line will be my playground when it comes to mods, putty, and sculpting.

What does this mean for you, the reader? Unicorn photo-gallery soon! I hope to be finished before the Musha MKII hits this thurdsay.

Friday, May 21, 2010

G, why not?

Neo Japan Mobile Fighter GF13-017NJII G Gundam!

I haven't been one to build the HG kits despite being around them constantly at work. I mostly enjoy the engineering of the Master Grade line and have stuck with that despite promptings from fellow Gunplars that I am missing out. I have an HG Hazel Custom buried somewhere in my work room that I was supposed to build alongside ASM and Buster of Plamo Addiction but that hasn't panned out yet.

While writing the item description for this kit I had a look through the manual and glanced at the runners and, well, it started to grow on me. Maybe because it looks F91-ish. Would that be F91っぽい?

So I'll tinker around with this when I get too frustrated with my Unicorn feet and before I start on the monster project that is going to be the Musha MKII.

Wish me luck.

Monday, May 10, 2010

Weekend stuff


Had a very busy Saturday, and made myself busy on Sunday.

Saturday morning I picked up a Canadian friend of mine who has recently moved to the Nagoya area. We used to train at the same dojo in Canada so he wanted to try out the training here in Japan. It's good to see old acquaintances again, however it also stood as a reminder of how far I have come since those old training days.

I had a japanese lesson in the early afternoon and as soon as it ended I hopped onto the train and made my way to Akihabara. Once out of the station, I saw this.
As you can see, there was a line. As I wasn't planning on going there that day it was of no consequence to me. I made my way to the old watering hole, the HUB, where I met ASM and was handed this.
Yup, Gundam shaped yaki anpan or whatever it's called. After discussing gunpla, life, the universe, and everthing with ASM for several hours over many beverages, I made my way home.

And slept.

The next day was mother's day, however, my wife had work in Tokyo so she left at her regular time leaving me at home to take care of my daughter. I wanted to take advantage of the gorgeous weather and finish up my decal work so I sat down at the kitchen table with my decals and supplies and handed my daughter a pair of scissors and construction paper. She learned how to use scissors while I cut out and applied decals.

The shield is now finished. Here's the lower half:
And here's the top half: Whoa! What's that? Dat's money!
(There was a bit of an episode when I went to apply the final top coat to this piece. The S2 blew off and away. I found it on the patio and carefully picked it up and put it back on, moving it into position carefully. Next time, Marksofter!)

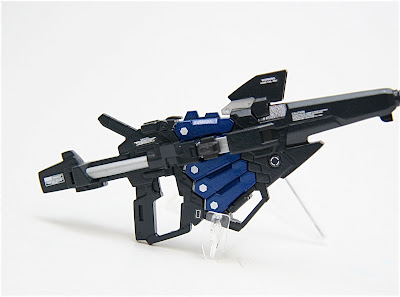
The other side of the bazooka has now been decaled and topcoated. I went for an a-symetrical look.


And after the decal work, my daughter and I went to a nearby park where we played on the swings and slides for an hour, then we did some shopping and had some lunch. She was getting cranky and started crying shortly after we returned home so I laid on the couch holding her on my chest until she fell asleep.

Then I carefully laid her on the couch, crept upstairs..

and built gatlings.
There will be work done to these.

For now, the entire Unicorn is finished! Except for the feet. I still have to construct the feet.