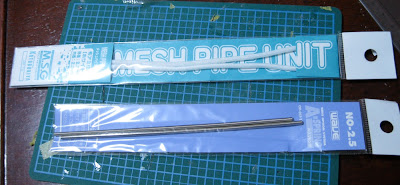
To begin the awesome, I needed some supplies. Here's some Wave 2.5 mm diameter spring and some Kotobukiya mesh pipe. But I will talk more about this later....

See this thing? (This part is for the lower leg armour for those who don't know.)

And these things? (These are for the rifle, btw)

Bam! (This is a secret for now)

Back to the spring. In order to do what I wanted with the spring I needed to 'reshape' a couple parts.
 But the result was well worth it!
 And fully functional too!
And glue, then trim.

I then bit the bullet and decided it was time to break out the putty. I am very 躊躇う when it comes to putty. (That kanji means 'hesitant to do', btw)
Polyester Putty:


Epoxy putty: (You can see I filled in the feet to make them look like geta)
Here's the underside of some of the shoulder armour.
 And here are more shoulder armour pieces.
 After some sanding (actually a lot of sanding)
 Not bad for my first real attempt with the epoxy putty. I am not so scared of it now.
In Hobby Japan we trust.
I was reading the Hobby Japan magazine to determine how the modeler went about modding the head.
 He cut a little of this and that. So I did too.
 Then I glued the helmet together.
 And a couple of hours later sanded down the seam lines in prep for painting.
 And I also finished up the backpack.
Even more awesome next time!


Wow this is really starting to take shape now. You sure are getting serious with the mods.
ReplyDeletei get more and more frightened of what you're making the more i see of it. springs instead of mesh covering... damn its brilliant! why didnt i think of that?!
ReplyDeleteNice plaplate work there! I have a feeling this musha would be a great customized one. You are really leveling-up on your gunpla skillz.
ReplyDeleteHats off, sir. This thing is going to be amazing and far outclass my own.
ReplyDeleteThanks for sharing these gundam modifieds.
ReplyDelete