Page hits. I feel popular!

Showing posts with label head. Show all posts

Saturday, May 16, 2009

Verniers and Head Deconstruction


I decided to start this kit with the head. I had some ideas I wanted to try right away. Usually I start with the feet, but what the hell, eh? I changed the shape of the chin, if you want to call it that. It was too long and rectangular before, now it is shorter and sharper.


I also wanted to do something different with the eyes but before I could do that I had to modify some pieces. Here is the main piece for inside the head.And here is my new model saw.

What have I done?!?!

Don't worry, everyone. See it still fits in there nicely.

And the bottom half as well.

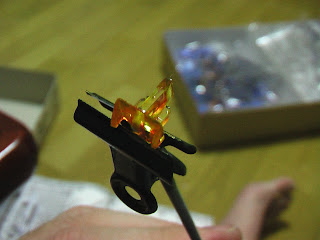
The top half is painted with clear orange. The bottom half will be painted black once I add some layers of plastic to make it thicker. I did sand down the tiny bumps that bandai had for eyes. ick.

I picked up some metal verniers to use on this kit.

For the back thrusters:

For the thrusters on the back of the legs:
For the bottom of the feet:
I realized I would have to modify the feet somewhat to make these fit but that is alright because I wanted to make this guy taller. I will be able to kill two birds with one stone.

Friday, May 1, 2009

Tonight I tackle the head.

If you have been following my progress on the F91 from the beginning (It's okay. You can admit that you haven't. No one will know.) you may remember that I wrote earlier about my problems with the head. You can read about it here

Well, tonight I may have conquered!
This piece is what caused me all the problems. The two circles on either side are supposed to be yellow, but I didn't know this when I assembled and glued the head together.

I sawed through the seam I glued on the back of the head to disassemble it and take that piece back out.
I tried masking everything and painting those two circles yellow, but the paint didn't stick. So I primed it and painted it yellow, but again the paint didn't take. So I sprayed it all black.

Then I came up with a plan.

The first step was to paint the front half of the head.

"But what about the yellow", you ask? Well, I thought I would do it one better.Picked myself up some 'vulcans'. There are twenty of these suckers in the bag. This should last me through several 1/100 MG kits. But they were too long, so I had to get to trimming and filing.
Once they were the right length I had to do some modifications to some head pieces. First I had to remove the plastic that would be in the way of my shiny, new, metal vulcans. Then I took my black gundam marker to make it black again.
I also blackened the inside of the head.


Then assembled the head and painstakingly glued in the vulcans.
Sweeeeet! Now I have to reglue the seam at the back and work on removing it before painting. That's for next time.

Monday, April 13, 2009

Pondering problems.. kids, read the instructions first!

間違いました。 だめだ!
So I committed one of the largest blunders you can when building a model kit. I failed to fully read and understand the instructions. Now I have at least one problem. See image below. More specifically, see the red circles on the image below.

説明書を読みませんでしたから、問題が有ります。


First, and foremost, (and the biggest,) is the side of the head. (see red circle). This is supposed to be yellow! When I was glancing at the instruction booklet, I thought this was a separate piece, and because I would be painting I thought I would put it on later. No! The worst part is that I cemented the head pieces together. So.. to make this yellow I have four options I am considering.

この丸の中パーツは黄色ではなくて、黒です。黄色だったほうがいいです。

1) Cut through the cement and seperate the pieces again. I don't really want to do it this way.

2) Mask off the entire head, except for that tiny piece and spray paint it yellow, then mask the yellow when painting the rest of the head. This seems painstaking.

3) Spray paint the entire head and then paint this piece yellow with a brush. I don't think I can get a good coat with just a brush.

4) Cut out that piece, paint it yellow, paint the head, and then try to glue the piece back in.

I think I will go for option 2, and if that doesn't work, then go to option 3. If worse comes to worst, I will try option 4. Oh, but that's not all..


If you look at the picture above, these pieces are supposed to be white with yellow on the inside edge, but the kit comes with it the same colour as the frame. Hmm.. I will mask off the tiny piece in the middle and spray it yellow I think.

此れも!

Again, according to the photo on the kit (which is always a prototype and not necessarily a production) the inside edge is suppsed to be yellow, with black panel lines. I think I could mask off everything except the panel edge leaving these two pieces together and paint it followed by a panel wash. hmmmmmm.
And this was the first problem I noticed and am attempting to correct. If you look at the red-circled diagram above you can see that this piece is white with black on the outside 'frames'. However, the kits has them in just white with no decals. So I went through the time-consuming process of masking off the white leaving the exposed parts to be painted black.
Then when the daughter was asleep rushed outside and gave them a coat of black.
After removing the masking tape, the result is not too bad. I will use my knife to scrape off some of the black that isn't supposed to be there. Then I will pull this piece apart (it originally is two pieces) and colour the inside yellow. Once that is finished, I plan to put it back together, mask off the black/yellow and spray it white.
Ahh. The joy of Gunpla

Saturday, April 11, 2009

Stage 1

Assembly started without too much trouble. I have cemented the head pieces together in an attempt to remove the seam lines. I didn't use enough glue and there is still a noticeable seam, so I may have to crack open the putty to fill it completely.

Here's the torso. I haven't completely snapped everything together, but rather have kept it loose so it is easy to remove to prepare for painting and whatnot. Here you can see a little piece of plastic that I have cemented onto the front of the chest. This will be painted with the torso to give it more depth.

These pieces will all be put on the back of the mech once painting is finished.
So far so good. I have almost finished assembling the legs and will start panel lining.