Yes, that was a (weak) play on words.
After building Gundam plastic model kits for over a year now my eyes are starting to wander. Don't worry, baby. You're still my number 1.
One series of kits that intrigued me were those from the Hoi Hoi mini-exterminator androids, or whatever those things are. I would glance at them when they rolled through the door at HobbyLink Japan but never felt the urge to pick one up until I saw this one. Pest-X san. A cute, little wavy-haired android dressed all in black and waving little daggers around? Count me in!
With painting of the Musha on hold in part due to three straight nights of lightning storms I decided Pest-X san's time had come and cracked open the box. With only my side-cutters and hobby-knife, we're talking straight-build, baby.
Interestingly, if I did decide I wanted to do some painting, Kotobukiya supplies me with decals for the face. That's a nice thought.

The box contents are pretty much what you would expect for this sort of kit.

All parts, of course, come molded in colour and Kotobukiya has even gone ahead and coloured some of the parts in two colours.

For articulation, a small set of polycaps and a runner of joint pieces are all this kit will need.

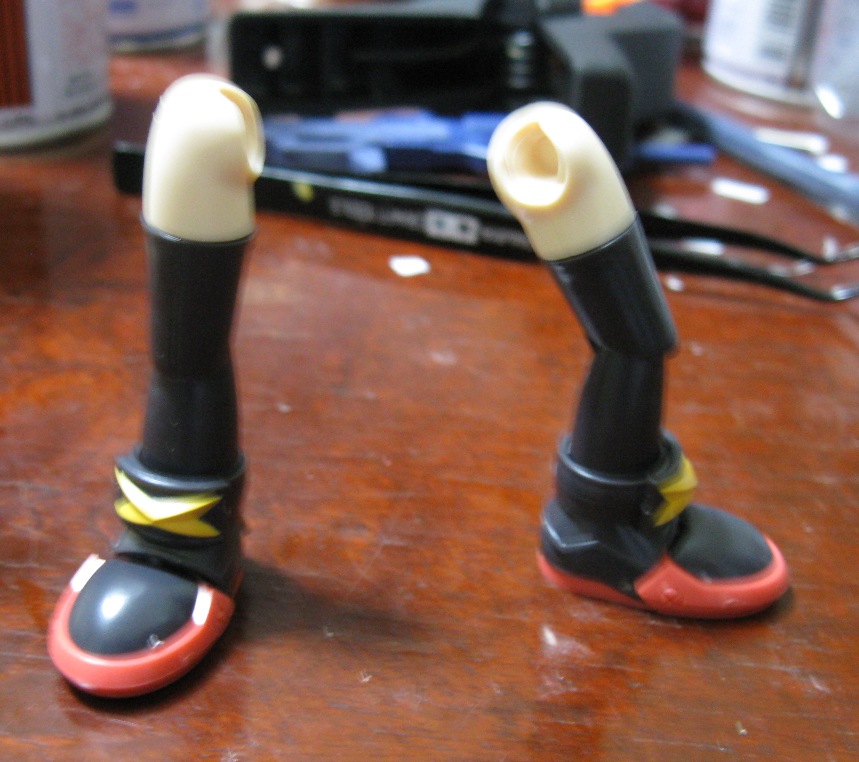
The manual starts with the legs and there's nothing out of the ordinary here. The hips are ball joints and the knees bend as knees should. The ankles are articulated by the round polycaps.

Put these pieces all together and you get: A blurry pic!

Next up is the hips. Some trimming with the hobby knife was required to ensure the fit was proper.

Then the torso. The small piece on the lower left of this picture is the zipper. It never stays in and I think I will be resorting to glue to keep it in place.


The coat and cape are articulated using tiny pieces.

And I mean tiny. Not surprisingly, these tiny pieces don't really stay in place.


The arms articulate at the shoulders and elbows and wrists, as one would expect. They hold together well.

If you don't know about these Hoi Hoi kits, Kotobukiya gives you three sets of eyes but only two faces. So one set of eyes will be lonely. Don't neglect it. You don't want to make Pest-X san mad.
My face of choice is the evil grin with the eyes staring straight ahead. That's right. That evil grin is aimed at you!

My back up is the smirk face with eyes looking to the right.

There are a lot of pieces used in the assembly of the head and for the most part that is a good thing. You get lots of articulation of the hair and hairpiece, etc. However, the downside is that the head is very heavy.


For weapons, the daggers and sword come as two pieces. I note with glee that one half of the dagger looks like a jutte. I may leave them that way and have the only dual-jutte wielding Pest-X in the world. (Well, I did until I wrote that sentence.)


As I just mentioned, the head is very heavy. Honestly, in my opinion it is too heavy. My Pest-X can't stand up on its own! For that, she needed a helping hand.

After playing (term used loosely. Is it really playing when you are starting to get angry?) I managed to get her standing on her own. Posing is almost out of the question, though.


Overall, it was a good way to kill an hour and a half and the look of the finished kit is very good indeed. She's cute and menacing all at the same time, and that's how I like it. I don't plan on picking up another Hoi Hoi any time soon, however, if another intriguing looking one comes out I will have to re-consider.
In other news...
I got myself the Real Grade 1/144 RX-78-2! I should note that this is not the same RG that I built for
GunplaTV With this kit I get to take my time and turn out a finished work that I can call my own. Already ideas are forming in my head.

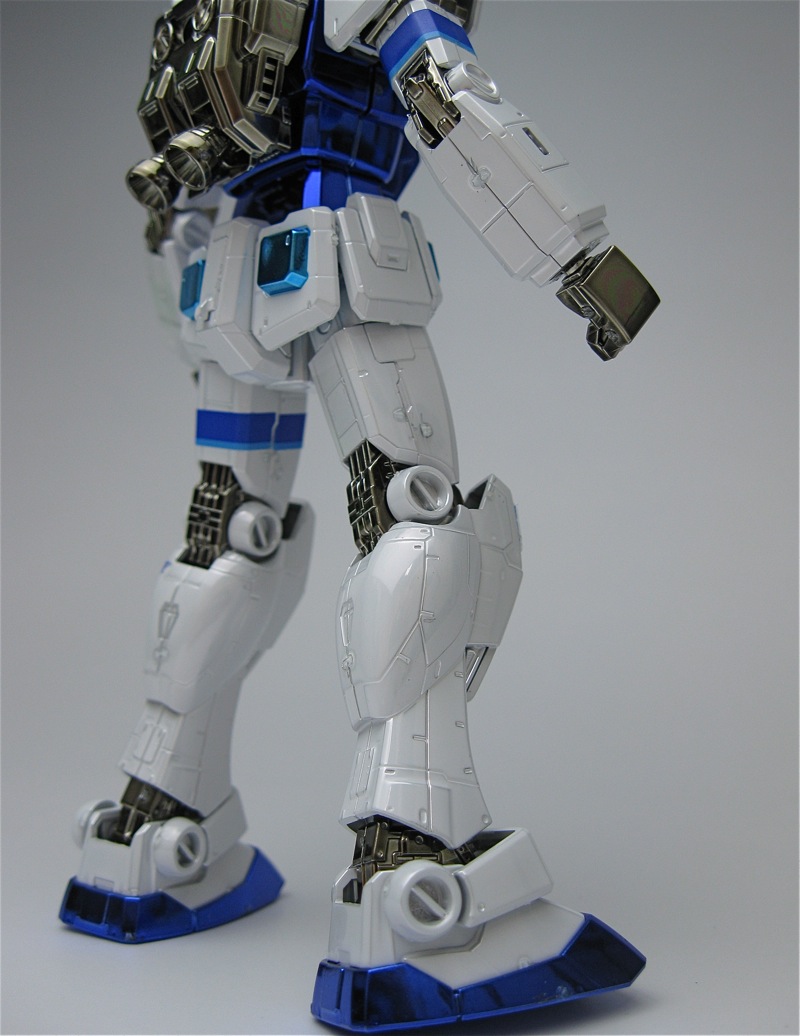
And, thanks to a good friend, I got myself a 1/144 ANA RX-78-2! The cool thing about this kit? Titanium Finish, baby!

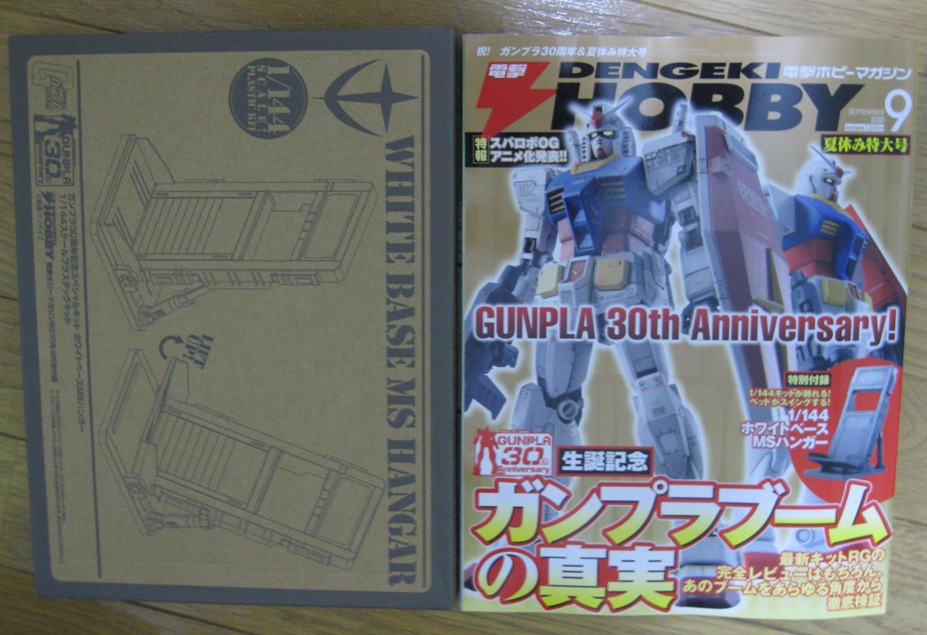
And today I went off to the local bookstore and grabbed the latest Dengeki Hobby which comes with a base for a 1/144 kit.

Next post will be on the ANA Gundam (built it this morning) so please look forward to that. And then, more Musha MK-II goodness!


 So I've called an end to my modifications and moved onto the final stages of the build; painting. For the main armour color I am going with Tamiya Semi Gloss Black and to give that armour a smooth finish, I resanded the pieces with 1500 and 2000 grit paper before priming. For pieces to which modifications had been done I used Mr. Surfacer before laying the paint down and for pieces that had no mods done I used Tamiya Primer. The secondary armour colour is Tamiya German Gray. For these pieces I used Taimya Primer White as a base and I also used the White Primer for the pieces that are being sprayed with Tamiya Light Sand. Yes, you read that correctly. Light sand.
 Here's the largest armour piece for the leg. What you can't see well from this picture is that before painting I drilled a tiny, shallow hole in two places along the shin area. This is for... well, you'll see.
 Another piece of the backpack. The entire backpack will be Black except for the metal springs I have used and one piece which I am painting German Gray for contrast.