Page hits. I feel popular!

Wednesday, July 21, 2010

MG Musha MkII Step6: More Awesome!

I had an idea in my mind what I wanted to do with the waist. Tonzo made a good point earlier about how it is narrow. I wanted to come up with a way to make it look like it was wearing a thick belt, much like a real suit of japanese armor. So off to my spare parts box I went.

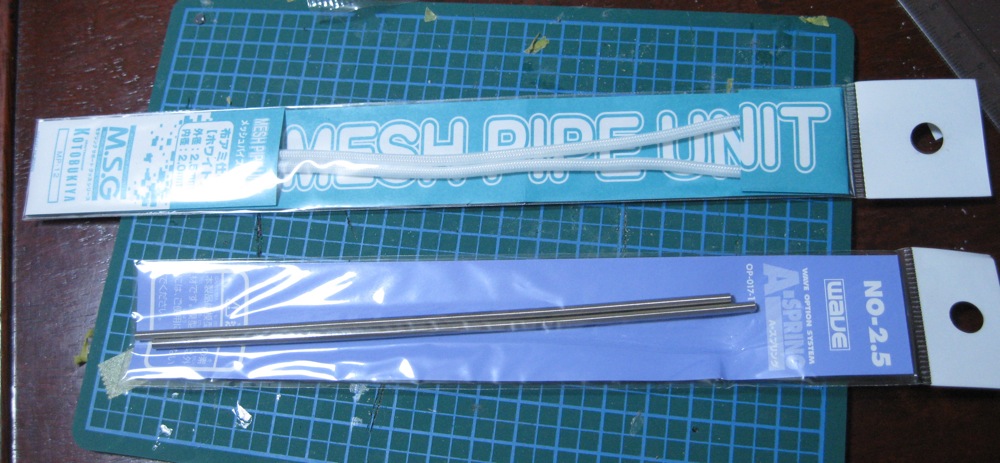
I found some things that looked promising and proceeded to.. well. see for yourself.

In order to bring my idea to fruition I had to mutilate some pieces. Such as the torso part of the frame.

Now you see it...
Now you don't.

And this part too.
Hack! Hack!


I then grabbed my trusty pin-vise and completed the next step.

This now allows the other spring I purchased to slide through.

And those pieces I cut off at the beginning of this thread? They form the 'belt loops.'

Awww Yeah!

I was commenting to a fellow gunplar the other day how I am now at the point where I am second guessing myself and wondering if I should stop now and quit while I am ahead. His reply was very succinct: "You've gone this far. You might as well go all out."

And he was right.

So I got the shoulders and glued some seam lines.

Then I grabbed the plastic again.


And also glued the seam lines on the back of the arm part of the frame.(You can see in this picture that I forgot to put the poly-cap back in before I glued it together. Oops!)


Took him to work this morning for a final test-build shot before I start the painting. Pretty much any white you see in the shot is a modification I have done.
Now that I look at it. I did a lot of stuff! Let's hope the final result is worth it.

Saturday, July 17, 2010

MG Musha MkII Step 5: Begin the Awesome!

Not a lot of text in this entry, but there are enough pictures to show everyone what it is I have been working on the last couple of days. The pace is picking up and this project is making a big jump.

To begin the awesome, I needed some supplies. Here's some Wave 2.5 mm diameter spring and some Kotobukiya mesh pipe. But I will talk more about this later....

See this thing? (This part is for the lower leg armour for those who don't know.)
Bam! (What did he do?)

And these things? (These are for the rifle, btw)

Bam! (This is a secret for now)


Back to the spring. In order to do what I wanted with the spring I needed to 'reshape' a couple parts.
But the result was well worth it!
And fully functional too!

And glue, then trim.


I then bit the bullet and decided it was time to break out the putty. I am very 躊躇う when it comes to putty. (That kanji means 'hesitant to do', btw)

Polyester Putty:


Epoxy putty: (You can see I filled in the feet to make them look like geta)

Here's the underside of some of the shoulder armour.
And here are more shoulder armour pieces.
After some sanding (actually a lot of sanding)


Not bad for my first real attempt with the epoxy putty. I am not so scared of it now.

In Hobby Japan we trust.

I was reading the Hobby Japan magazine to determine how the modeler went about modding the head.
He cut a little of this and that. So I did too.
Then I glued the helmet together.And a couple of hours later sanded down the seam lines in prep for painting.
And I also finished up the backpack.

Even more awesome next time!

Wednesday, July 14, 2010

MG Musha MK-II Step 3: Mods and another Test Build

I received a couple of questions about how I modded the thigh armour to look more like yoroi (鎧). Well, allow me to explain.

Here's my Evergreen Styrene which measures 0.25 mm thick by 4.8 mm wide. Due to its thickness, or thinness, in this case, it bends easily without creasing allowing it to be placed over curves. It also sticks almost instantly once glue is applied meaning I could put the piece on, come back a few minutes later and trim the excess away.

I also used it for adding detail to the shoulder armour.

Glue. Then trim.

I also added it to the top of the lower leg armour to cover up the hollow that was visible.

Glue. Then trim.

I also added extra plastic to the center block of the skirt armour. This was 0.5 mm thick.

Say it with me. Glue. Then trim. (then sand).


I have also worked more on removing some of the seam lines as this kit has quite a few of them. For those who don't have the kit in their hands this piece has a visible seam line on the very top. However, I failed to notice that I am supposed to insert a length of the mesh pipe before assembling. Oops.


I have also finished removing the gold plating from all those pieces. That took a lot of time, some paint thinner, and sanding. I went through at least a sheet of my 400 sandpaper.

I then decided to reassemble it, a test-build 2.0 if you will, to see where I was at before deciding on what to do next.

The results so far are more than satisfactory.

Some things I noted that I (may) want to fix:

1) The head seems too high on the neck. I have a plan for the helmet but may also have shorten the neck or make some kind of collar as well.

2) The seam lines from the were-gold pieces on the feet are visible and asymetrical. I will have to glue them together and take out the seam line before painting.

3) On the outer part of the lower leg, the was-gold piece has what looks to be a cylinder and I can't figure out what it is there for besides looks. I may cut down that piece and reshape it.

4) The feet. If this was a suit of armour the wearer would have geta (下他?)on his feet. Basically a split toed look. I am considering using putty to fill in one of the hollows on the end of the foot.

I am still in the process of narrowing down my colors for this kit. I think it may have 5 colours when all is said and done. Yikes! I have to write this stuff down before I forget.

Monday, July 12, 2010

Introducing Gaijin Gunpla Junior!


It was a rainy day yesterday and my daughter and I got a little bored sitting at home so we grabbed our umbrellas and walked up to the Toys 'R' Us, or as she calls it, "ABC!" She likes to read the big letters on the wall every time we go there and then she sings the ABC song for a while afterwards.

Once inside I headed towards the Gundam section but she grabbed my hand and led me off to the section where the riding toys are located. She found one she really liked and proceeded to putt around the store for 10 minutes. I eventually gave up following her and told her I was going to see Gundam and she followed me on the toy.

"Gundam yaritai! (I want to do Gundam!)", she said when she saw all the boxes, so I grabbed a couple of SD/BB Gundams and asked her which one she wanted.

"Kochi (This one!)"

The O Gundam Type A.C.D

I have no idea what any of that means, but it's kind of cute.

So we went to the cashier, paid our 499 yen, and walked home, although she decided she didn't want to carry her umbrella so I had to follow behind her holding her umbrella above her the whole way.

"Akete! Akete!" (open it!) is what she asked me as soon as we got in the door. So I did.

I didn't bother using any cutters, just pulled the parts from the runner and handed them to her and showed how they fit together. She, for the most part, put the parts together on her own.


Of course, her favourite part was the stickers and she did her best to put them in the right area. I had to fix only a couple of them. Once the sections of the SD were assembled she stuck the ball joints into their sockets and we were done!


Excellent!

And the most important thing when it comes to Gunpla, and life in general, is to enjoy yourself.


Good job, junior!