Page hits. I feel popular!

Tuesday, January 26, 2010

CLEARly it's a Gouf.


Having purchased the Gouf with bonus clear parts, it means I get a chance to play around with the armour. So, of course, I took some pictures. Note to everyone who may want to do this: The clear armour pieces on the legs are extremely difficult to remove once on.

They snapped as I removed them leaving tiny shards of clear, hard plastic in the frame. I had to pry them out with my tweezers being careful not to damage the frame and making it unable to fit the proper armour parts.


As of this writing, all pieces have been painted and the decaling has commenced.

There are a lot of decals...

Monday, January 25, 2010

Hand it to GM


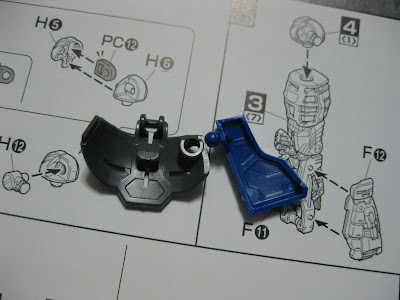
If you have been following my blog (and I sure hope you have) you will hopefully remember the problems I previously mentioned about my GM 2.0's hands. If you don't wish to read back to find out what happened. I will let the picture speak for itself.

I was thinking of making it into a diorama with hand parts everywhere showing that weak little GM got his ass, or in this case hands, um.. handed to him.

But I don't have time!

So instead I came up with a better, quicker solution.
Sorry, Shin Matsunaga. But it's for the greater good. Well not really, but it is advantageous to you. Why do I say that?


Good old Bclub. I can use Matsunaga's hands for the GM (just paint the armour black) and then give the White Wolf 3 pairs of detailed hands. (So, it could be said that GM got Matsunaga's hands handed to him. Now I am confusing myself.) Of course, this means I am thinking of redoing the white zaku like I did the Shin Musha Gundam. HobbyLink Japan has waterslides in stock. Mmm.

Also, it appears that RX-78-3 is getting used to life on my desk.


Hey, wait a minute! That's not yours!

Sunday, January 24, 2010

Gouf-ing around


As I was just about at work on Friday morning I received a text message from the wife stating, "今日退院!"

What that means is that she was going to leave the hospital that day. So, while she is at home and I am very happy that she is back, it also limits my gunpla time. Or does it?

You see, she is still very weak and must spend a lot of time in bed resting, which for her means surfing the internet to catch up on the 2 weeks worth of everything that she missed. This also means that I am the primary caregiver for my daughter so I spend all my time with her. Which means, my daughter and I sit at the table and build gunpla. I build the Gouf and she colours the bonus clear parts with a red ink pen.

So, how is the build? Let me show you.

The Head
If you have built any of the Zaku 2.0s or the Sinanju, you have a pretty good idea already how the head assembles. The mono eye moves from side to side as the head rotates. Rather than use the supplied pink sticker or the pink eye decal (Of course I bought the decals!) I used one of my Aurora stickers. I am trying to use up old supplies here, or so I tell myself.

Torso
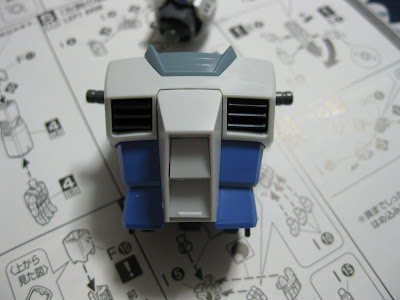
Again very Zaku like. The black chest piece isn't on in this shot because I painted all the black parts (chest, feet, knees, etc) with the leftover semi-gloss black that I have.

The Skirt
Again it's basically a Zaku 2.0 skirt with some changes. The side armour is actually done differently. If you look at the pic below you can see that a ball and socket joint is used to attach the front skirt armour to the side. One problem I had with the side pieces is that, due to the curvature of the armour and frame parts it is really difficult to line them up properly so they fit together. Both sides caused me some delays when doing this.

Pistons

Having done enough Gunpla now and knowing beforehand that I was going to paint the feet pistons like I always do, I snipped that part of the runner away before I even went near the feet and sprayed it with some leftover Mr. Hobby Silver. Say "No!" to Silver Leaf.

Feet

An hour or so later when the paint has dried I assemble the feet. Here you see only one foot with the armour on. There's a reason for that. Read on.

Backpack

Again with the Mr. Hobby Silver for the internals of the backpack. Silver thrusters = yummy.

Shield

Terribly simple. Only four pieces and that was it. There isn't much else to say here.

Legs

I reiterate the point about it being another Zaku 2.0. In fact, the runners were for the Zaku 2.0 with an extra runner for the Gouf pieces which are different. Thus you end up with half a runner of unused Zaku leg parts. I will add them to my extra parts collection.

Arms
Zaku 2.0. 'Nuff said. The only real difference is how the shoulder armour attaches. That and the big fat hand for the left arm.

And here he is. Fully half-assembled. This seems to be my new thang. I armour half the mecha so I can show what is going on in da inside.


Was it fun, baby? She can say, "ガンダム" now.

Friday, January 22, 2010

Not-so-preliminary shots.

This is he with decals applied. The weapons weren't finished at this time so they aren't in the shots.


To infinity.. and beyond!


Here you can see some of the minor painting I did. Mr. Hobby Silver makes the bazooka look that much better.

With the occasional panel-lining. I don't panel line everything just for the sake of it. In many cases, the contours of the mecha itself are enough. For other things, panel lining is done just to draw some attention that way.


And the next day.. with his guns ready.


Here you see the Mr. Hobby Silver and the minor panel lining.


My verdict on this kit: Sexy!

Thursday, January 21, 2010

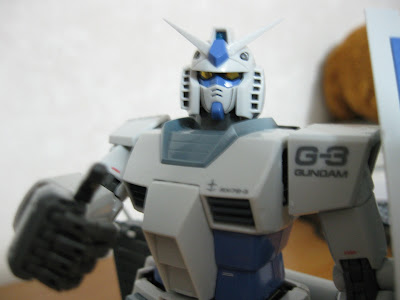
RX-78-3 Preliminary shots

Just some shots I took during the first session of the RX-78-3 build a couple of days ago. This is exactly the same kit as the RX-78-2 Ver 2.0 and the same frame as the GM 2.0 so I could do this thing with my eyes closed. I prefer the RX-78-3 to the RX-78-2 in terms of colour scheme.

The sliding mechanisms in the arms look very nice and allow a lot of movement while still looking like a piece of heavy machinery.

I sprayed the thrusters and inside of the backpack Mr. Hobby Silver just to make it stand out a bit more. Backpack! Backpack!
The sliding mechanisms on the legs are very similar to those found on the arms. The range of motion in this kit is impressive and it makes me glad that I didn't paint it because I will be able to pose it willy-nilly without worrying about scuffing paint.
I knew I didn't have enough time in one night to completely build the mecha. In the midst of the build I thought that it would be a change to build it half complete and half 'nekkid'. This way I could pose him for some pics then and there. It also shows off the frame like you see in the instruction manuals.


The next night (yesterday?) I completed the build and top coated and tonight I put on all the decals. I used the leftover waterslides from the RX-78-2 build and some of the dry transfers. Stickers.. No way! Decaling has become the favourite part of a build for me. I look forward to completeling a kit just to apply decals.

Tomorrow will see me putting on the last of the decals on the weapons and doing some panel lining and touch up and he will be all finished. Then Gouf! or is it, Diorama?